Thursday, January 20, 2011

Flower Girl Dresses


Here is the beautiful bride, my sister Susan, my mother, the seamstress, and the girls with their cousin Anne.


This first dress is one of the three identical flower girl dresses that my mother made for the older three girls to wear in Aunt Susan's wedding back in August. It doesn't look white in some of the pictures, but they are snow white with a gorgeous separate sparkly overlay sewn on top of the heavy satin. The back of the skirt has a matching, but less detailed overlay. She made them with a sweetheart neckline and added a cute cap sleeve. They are immaculately made and I've been meaning to post pictures of these gorgeous dresses for a long time. The girls made the comment that they felt like princesses in these dresses. Another said it was the best day of her life. When I asked her why, she said because "I felt so pretty!". I thought that was cute.

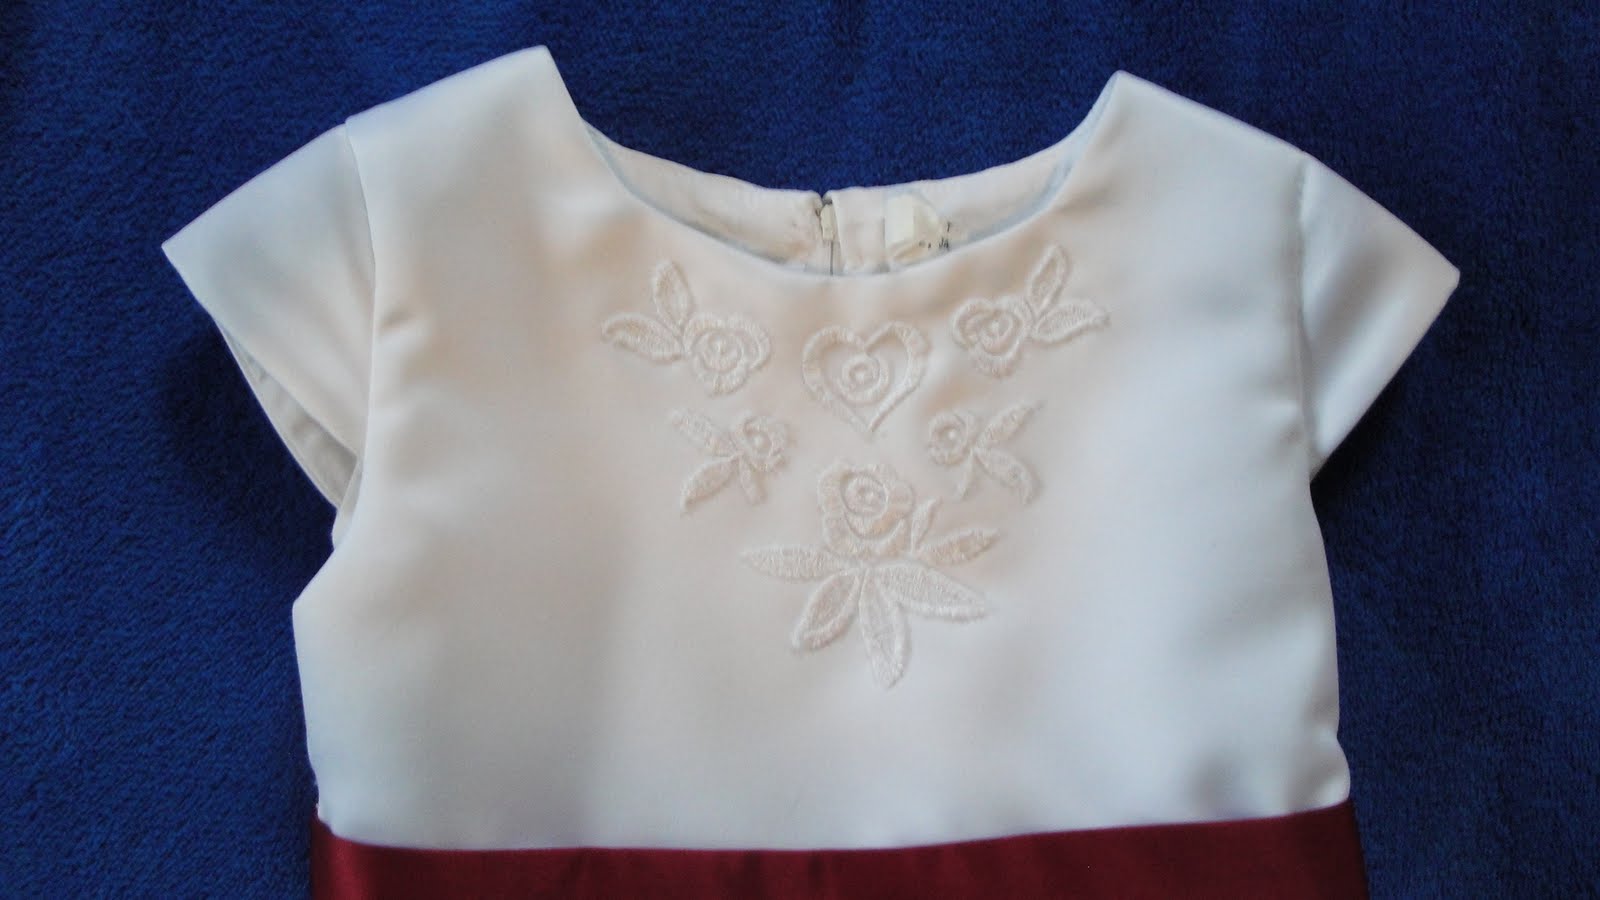
This one is a little different than the first three that the older girls wore. It is still made of the heavy white satin, but this time with a different lacy overlay that didn't have sparkles. My mom added the red belt and pre-tied bow to coordinate with the bridesmaid dresses. R wore this, but she wasn't technically in the wedding, just looked like she matched the rest of us and her cousin Annie. Here is the resulting family picture with all the girls dressed up while all the guys are in there tuxes with tails. Just goes to show that we can clean up! LOL.

Barbie Birthday Cake


C's birthday party had to be postponed and rescheduled due to the stomach bug hitting 7 out of 8 of us. However, once everyone was back to normal, we took her cake out of the freezer and I decorated it the way she wanted...a blue dress with lots of pink bows. We even added some extra details to finish the outfit in true Barbie style (over the top and glammed out with plenty of jewelry). I ended up adding ear rings, a necklace, bracelet, nail polish, and a ring. She even had pink buttons going down the back of her dress.
Simple Tips on Making this Cake:
For this cake I divided two cake mixes into four round pans to bake. After cooling, I frosted the top of the bottom cake and laid the next layer on top. I continued doing this until I had all four layers stacked on top of each other. I then began to carve the cake into the correct "bell" shape I needed for the ball gown. When it came time to put Barbie in her dress, I cut a large whole in the center with an apple corer (because I had to freeze this cake, it worked really well to use the corer before it was completely thawed). Next I frosted the skirt. Then I added the Barbie doll that I had wrapped in plastic (just to keep the cake and frosting out of her nooks and crannies!). To make the bodice which would cover Barbie's torso and bust, I used a star shaped tip. To finish it, I used a small straight line tip (I think a Wilson #2 or #3) to do the nail polish, jewelry, and fine details. I hope these tips help you in making your little girl a Barbie cake.

Saturday, January 8, 2011

Birthday Cake

B decided this year to have a Tiinkerbell on her cake. She picked out the design she wanted and then I was supposed to magically make it appear. Here is the way I did it.

I made a stencil, like I did last year for her Winnie the Pooh cake. This time I took pictures of it step by step. Although I neglected to take a picture after adding each color. The challenge is to think in reverse, doing the color farthest away or underneath first.
First try to pick a simple line drawing you can cut out.
Second, cut out the design, making sure to cut away some of the interior lines similar to a stencil. (Notice the missing eye, cut between the two legs, and the bodice line of her dress. These are examples of doing just that.)
Next lay the stencil on the frosted cake. B chose to have a blue sky background for Tinkerbell so it looked like she was flying in the air. With a tooth pick trace around the edges and interior lines that you cut out earlier to ensure that the outline "transfers" to the cake.
Next, take off the stencil and finish touching up the outline to make it appear more like the line image of the figure you are doing.

Finally, color in each section, color by color starting with the on which is in the background. In this case that meant doing the white wings first, then the peach skin parts, then the green dress, and finally the yellow hair.

In the future, if I ever do this character again, I would try to make her larger so I could be more accurate on the facial features. The smaller the character the harder it is to get an accurate representation of the smaller features such as the nose and eyes.


B loves it and that is all that matters! I hope you enjoy making your own character creations.

God bless.

New Year's Eve Party 2010-2011


My friends, Charity (who is 8 1/2 mo. pregnant) and Jennifer.

The men discussing theology.

The kids singing together.

The two nursing moms.

This year we decided to have a few of our friends over to celebrate the coming New Year. Three families were able to attend, in all 6 adults and 20 children. Interestingly enough, two moms had a nursing baby with them, while the other two moms are pregnant.
The kids had so much fun playing dress-up, games, cards, and singing Christmas carols. We even took a break and prayed the rosary as one big group before the clock struck midnight. It made for a festive and holy night. Everyone had so much fun that we just might do this again next year!

Enjoying Christmas Presents


Our traditional procession of taking baby Jesus to the manger, while singing Silent Night. We do this every year before opening presents. Each child puts a baby Jesus in the creche. ( Not very accurate, I know, but it saves from everyone fighting over who does it!) This way each child is looking at a baby Jesus in his/her hands while singing and processing. By doing this simple tradition we hope to remind each of them that Jesus is the greatest present we have and could ever receive! He is also the best gift we can ever give someone else, that is the knowledge of Him and what He has done for each of us.
The guys with their jersey's and T-shirts.

The girls with their play-dough cake creations kit.
Some creations using the Harumika toy. (Not the most modest of dresses, but the say they pretend that they have sleeves.)
T shooting his Red Rider BB gun on Christmas Day.